Wedding, engagement, Valentine’s Day—every occasion is a good one to create a short video with your most beautiful photos. Here are four simple steps to make your own.

1
Get ready
Before you get started, select the photos that you want to include in your montage. If you’re putting together a montage for a special occasion, such as a wedding anniversary, ask family members if they have special photos to lend you. Also, don’t forget to choose one or two of your sweetheart’s favourite songs as background music.

2
Choose your software
You have two options:
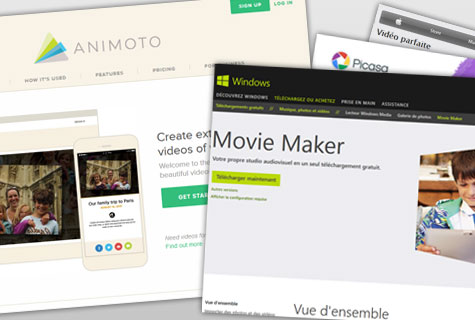
- Visit well-known websites, like Animoto (animoto.com).
- Download software like Picasa (picasa.google.com), Windows Movie Maker (windows.microsoft.com), or the Perfect Video app (https://itunes.apple.com/fr/app/video-parfaite-logiciel-montage/id598542901?mt=8) if you’re creating the montage with your cellphone.

Here are a few key points to help you decide which one is right for you:
- Is the software free, or does it cost money?
- How long is your video? For example, videos made with Animoto can’t exceed 30 seconds. That’s great when you’re making a quick video for your friends, but it’s rather short for a wedding anniversary or romantic video. However, try not to go over 15 minutes, no matter what the occasion.
- Some programs give you access to advanced features, like maps, voice synthesis, even special effects.
- What about video quality: do you want your video be in High-Quality (HQ) or High-Definition (HD)?
- Can you save your video and come back to it later?
3
Make the video
Making the video is usually pretty straightforward, as most programs provide you with a short tutorial or even guide you every step of the way. You’ll need to:
- Select one of the program’s proposed themes. Choosing the perfect frame for your photos will automatically give them a professional feel.
- Import and position the photos to your liking.
- Choose and position your titles and captions.
- Download your background music.
- Pick the transition style you want between photos. For example, do you want one photo to blend into the next, or do you want each slide to cut to the next more abruptly?
- Preview the montage and make any final adjustments.
4
Share your video
Once you’ve completed your video montage, save it to your computer before sharing it. Forget about sharing it via email—most video montage files are simply too big to send this way. Depending on the program used, you might be able to share a link to your montage with your loved ones, or upload it to YouTube. Whatever your sharing method, make sure to set your montage to private.


