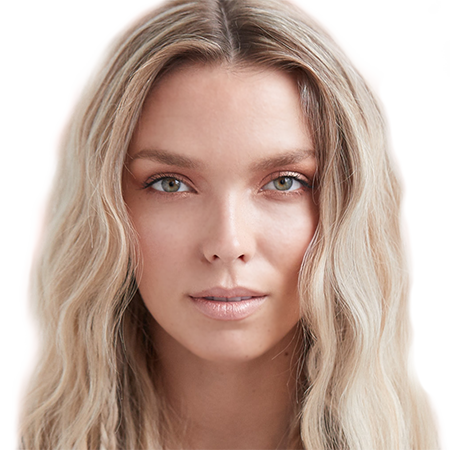
hairstyles
for 2017!
For many, a new year means the irresistible urge to try a new ’do. Véronique Beaupré, from Local B hairstyling salon, presents four hairstyles inspired by the runways and easy to reproduce at home. If you like the tousled look, you’re in luck!
HIPPY BRAIDS
Spotted on the catwalks of Roberto Cavalli, this hairstyle features discreet, ultra-fine braids that frame your face. It’s a beautiful blend of Woodstock and Ibiza!
The necessary tools:
- Clear elastic bands
- Flat iron
- Ionic Straightening Brush
Loosely braid the hair for natural, wavy results.
Step by step
1) Begin by separating your hair (make sure it’s dry!) into five equal sections, which you then braid.
2) Press the flat iron onto each braid, making sure you don’t slide the hot tool along the hair. Instead, apply pressure to each portion of the braid, from root to tip. Allow the hair to rest.
3) Once the braids have cooled down, undo them and run your fingers through the strands a few times to detangle them.
4) Now, simply make two little braids at your ears and tie them off with small clear elastic bands.
5) If you like, you can complete the look by lightly crimping the hair halfway down to create more volume.
THE MESSY HALF-BUN
We got our first glimpse of this updated version of the half-bun at the Stella Jean runway show. It’s a tousled half-bun worn high on the head with a portion of ultra-voluminous hair loose around it. Not only is this style handy and easy to do, but it has an undeniable cool factor! You can bet this will be the hottest trend of 2017 for beauty lovers who are pressed for time!
The necessary tools:
- Flat iron
- Ionic Straightening Brush
- Hairpins
- Texturizing spray
Create a bun by twisting the hair for a casual tousled look.
Step by step
1) Start by spraying your hair with a texturizing product, then make a horizontal part around your head, from one temple to the other.
2) Next, frizz the upper portion of hair with a brush to give it texture and volume, then create a bun above the head and set it in place with hair pins. Tip: For better hold, it’s preferable to crisscross the hairpins.
3) To give the loose portion of hair an XXL effect, frizz sections about three inches wide by one inch high, then press the flat iron onto them, without sliding it.
4) When the hair has cooled down, give it a few brushes to defrizz it without lessening the volume. Don’t worry about being too precise; the more tousled the better!
STYLISHLY SLICKED BACK
You have such a pretty face, so why hide it? We just love this chic casual look, seen on runways by designers Miu Miu and Jason Wu, which consists of slicking back your hair while leaving it loose and free at the back.
The necessary tools:
- Hair dryer
- Ionic Straightening Brush
- Styling gel
- Tail comb
- Shine spray
For a modern look, part the hair in a zigzag from back to front.
Step by step
1) On damp hair, apply a styling gel from the roots to your ears, following the contour of your face.
2) Next, dry your hair with your head downward, making sure to lift the hair at the roots.
3) With your head still down, use a tail comb to make a central part or zigzag from the nape to the forehead. Hold down both sections of hair then lift your head back up.
4) To finish, brush your hair back, paying close attention to the sides, then apply a thin coat of shine spray to the top of your ’do.
THE BOHEMIAN ROMANTIC
Seen at the Philosophy di Lorenzo Serafini fashion show, the bohemian romantic is feminine, sensual hairstyle. Its advantage is that it goes just as well with a glamorous look as it does with something more casual.
The necessary tools:
- Curling iron
- Ionic Straightening Brush
- Hair clips
- Thermal protective spray
- Light hairspray
Once the hair cools down, brush it to undo the curls.
Step by step
1) First, separate your hair with a side part. By parting the hair slightly off-centre, it gives the style a somewhat messy look, which of course isn’t the case.
2) Next, divide your hair—make sure it’s dry—into four sections: from one ear to the other, then from the forehead to the nape.
3) To protect your hair from the heat of the curling iron, spray each section with a thermal protective spray, then divide each section into four smaller sections. Use hair clips to keep the 16 sections well separated.
4) Curl each lock with a curling iron. When you’re finished, gently brush your entire head of hair to give it light waves.
5) Lastly, spray your ’do with a light-hold hairspray. And there you have it!

